 Save
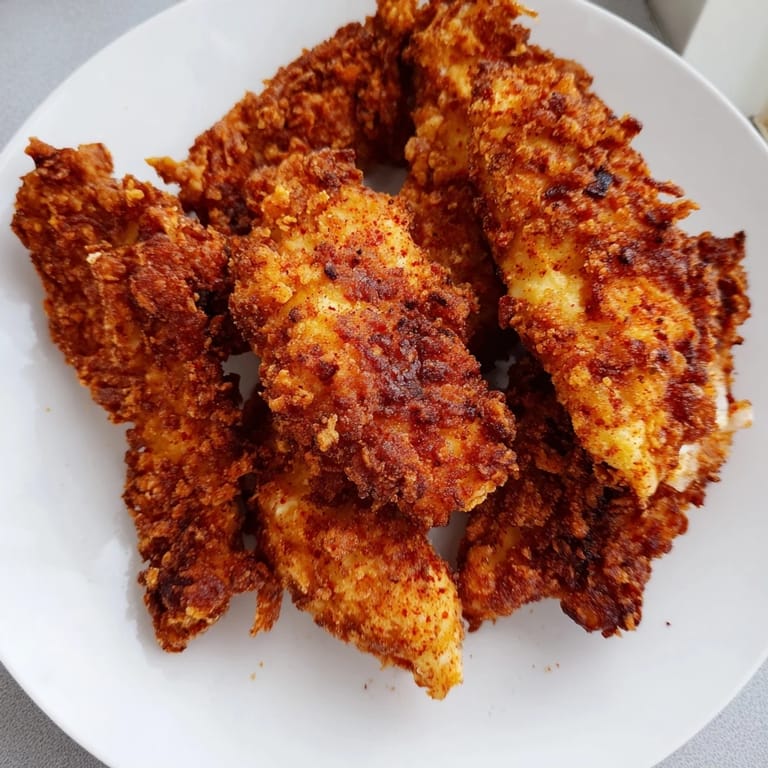
Save There's something magical about the first bite of truly crispy fried chicken. My sister called me one Sunday afternoon, frustrated because she'd tried making fried chicken three times and it kept coming out either soggy or tough. When I asked what she was doing, she admitted she'd skipped the marinade entirely—just dredged and fried. That night, I walked her through it: the buttermilk soak changes everything, tenderizing the meat while adding a subtle tang that makes the coating stick better. Now she makes these tenders constantly, and they're always golden and juicy.
I made a batch for a casual weeknight dinner during a particularly chaotic week, and watching my kids demolish them within minutes reminded me why simple, well-executed food matters. My nine-year-old asked for seconds, my five-year-old ate with both hands and pure joy, and my partner—usually skeptical about homemade fried food—admitted these were restaurant-quality. Those moments, when you nail something that brings people to the table, are the ones that stick with you.
Ingredients
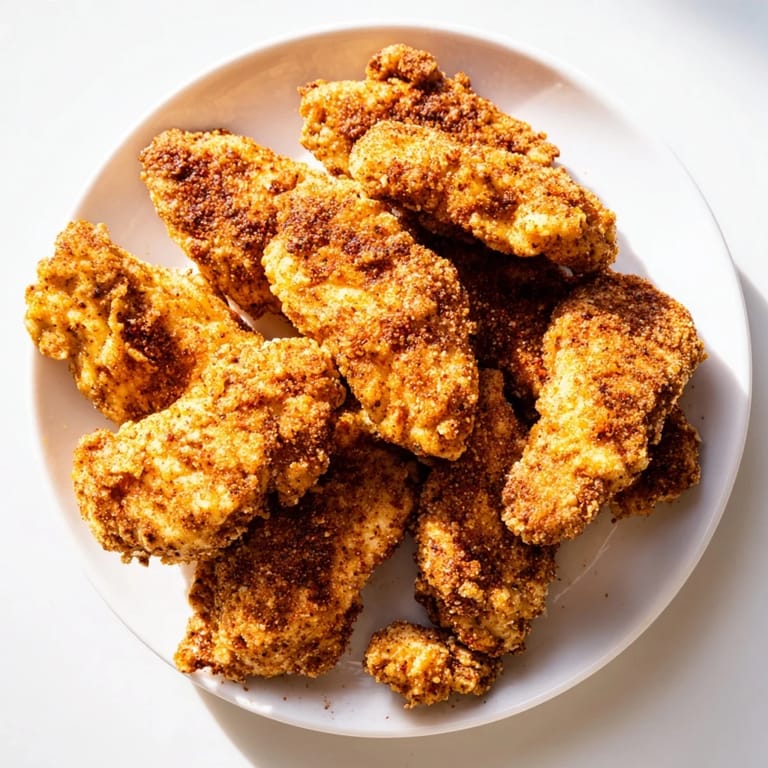
- Chicken tenders (1.5 lbs): Use true chicken tenders if you can find them, as they're thinner and fry faster than breast strips—more uniform cooking, less burnt edges.
- Buttermilk (1 cup): This is the secret weapon—the acid tenderizes the chicken and helps the seasoning penetrate, plus it makes the coating adhere like glue.
- All-purpose flour (1.5 cups): Don't skimp here; you want enough to do a generous double dip if you're going for maximum crunch.
- Baking powder (1/2 teaspoon): This tiny amount creates CO2 bubbles during frying, making the coating light and crispy instead of dense and heavy.
- Garlic and onion powder (1/2 teaspoon each): Pre-ground spices add savory depth without overpowering, and they blend seamlessly into both the marinade and coating.
- Paprika (1 teaspoon total): Split between marinade and coating for layered flavor and a warm, slightly smoky note.
- Vegetable oil (enough for 2 inches): Any neutral, high-heat oil works—vegetable, canola, or peanut oil all fry beautifully at 350°F.
Tired of Takeout? 🥡
Get 10 meals you can make faster than delivery arrives. Seriously.
One email. No spam. Unsubscribe anytime.
Instructions
- Create the marinade and soak the chicken:
- Whisk buttermilk with salt, pepper, garlic powder, onion powder, paprika, and cayenne in a large bowl. Add chicken, coating thoroughly, then cover and refrigerate for at least 2 hours—this is the time when the magic happens, so don't rush it.
- Prepare your seasoned flour:
- In a shallow dish, combine flour, salt, pepper, paprika, garlic powder, onion powder, and baking powder. Mix thoroughly so the seasonings are distributed evenly; lumpy flour means uneven seasoning on your chicken.
- Dredge with intention:
- Remove chicken from buttermilk, letting excess drip off into the bowl—don't skip this or your coating will clump. Press each tender into the seasoned flour, coating all sides and pressing gently so the flour adheres.
- Heat your oil to the sweet spot:
- Pour 2 inches of oil into a deep skillet or Dutch oven and bring it to exactly 350°F, checking with a thermometer. If the oil is too cool, you get greasy chicken; too hot, and the outside burns before the inside cooks.
- Fry in batches without crowding:
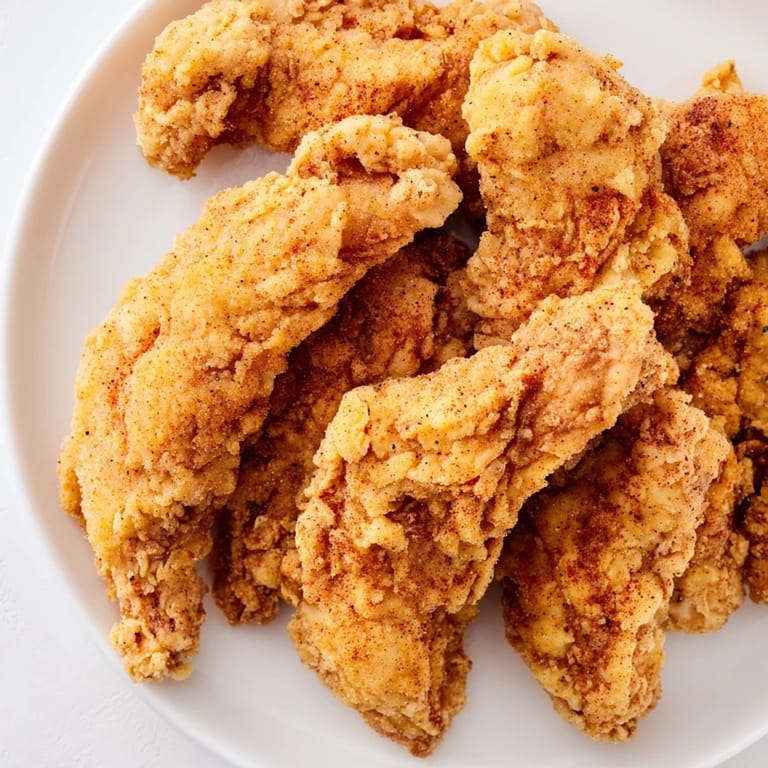
- Carefully place 3 or 4 tenders into the hot oil and fry for 3 to 4 minutes per side until deep golden brown. Work in batches so each piece has room to crisp—crowding the pan drops the oil temperature and creates steam, which ruins crispness.
- Drain and serve immediately:
- Transfer cooked tenders to a wire rack or paper towels to drain. Serve while still hot, ideally within minutes—the interior stays juicy, the coating stays crackling crisp.
 Save
Save I'll never forget the afternoon when my neighbor smelled these frying from three houses down and just appeared at my back door with a hopeful smile. I gave her a plate, she ate one, and her eyes actually closed for a second in that way that happens when food hits just right. She came back the next week asking if I'd teach her, and now we do a monthly fried chicken night where we compare techniques and compete on crispness. Food does that sometimes—it builds friendships.
The Double-Dip Secret
For absolute maximum crunch, there's a trick worth knowing: after your first flour coating, dip the chicken back into the buttermilk for just a second, then immediately coat in flour again. This creates a thicker, extra-textured crust that shatters when you bite into it. It takes maybe thirty extra seconds per piece, but the result feels fancy without any actual complexity. I started doing this after reading about Nashville hot chicken techniques, and once you taste the difference, you won't go back to single dipping.
Serving and Pairing Ideas
These tenders pair beautifully with creamy dipping sauces—honey mustard is the classic choice, ranch is always welcome, and hot sauce transforms them into something spicy and alive. Serve alongside something cool and bright: coleslaw, a crisp salad, or just lemon wedges for squeezing. The contrast between the hot, crispy chicken and cool, fresh sides makes the meal feel complete rather than heavy, and suddenly it feels less like fried food and more like dinner.
Storing and Reheating
These keep in an airtight container in the fridge for three days, though they're genuinely best fresh. To reheat without losing crispness, pop them in a 400°F oven for 5 to 7 minutes—the microwave will make them soft, which defeats the whole purpose. I sometimes intentionally make extra just so I can have cold leftovers the next day for lunch, crispy coating and all.
- Leftover tenders make incredible chicken sandwiches with a simple slaw and mayo on a soft bun.
- Chop them into a salad for a quick, satisfying lunch that feels fancy.
- Keep hot sauce and napkins within arm's reach because these are messy, finger-licking good.
 Save
Save Buttermilk fried chicken is one of those recipes that feels simple until you've made it perfectly, then you understand why it's been a standard for generations. Once you nail it, you've got a skill that impresses people every single time.
Kitchen Questions
- → What is the purpose of marinating the chicken in buttermilk?
Marinating in buttermilk tenderizes the meat and infuses it with tangy flavor, keeping the chicken juicy during frying.
- → Can I substitute all-purpose flour with a gluten-free alternative?
Yes, gluten-free flour blends suitable for frying can replace all-purpose flour for those avoiding gluten.
- → How do I achieve extra crunch on the coating?
Double dipping the chicken by coating it in flour, dipping back into buttermilk, then coating again creates a thicker, crunchier crust.
- → What oil is best for frying these chicken tenders?
Vegetable oil or other neutral oils with a high smoke point work best to ensure even frying and crispiness.
- → How do I check if the chicken tenders are properly cooked?
Cook until the coating is golden brown and the internal temperature reaches 165°F (74°C) for safe consumption.