 Save
Save One lazy afternoon, I was rummaging through my pantry looking for something to snack on when I found a dusty stack of rice cakes I'd bought months ago. They sat there, pale and uninspiring, until I got the wild idea to treat them like little edible platforms for melted cheese. Twenty minutes later, pulling them out of the oven golden and bubbling, I realized I'd stumbled onto something genuinely crave-worthy. Now they're my go-to when I need something satisfying without the fuss.
I made these for a small gathering once, and watching people's faces light up when they bit into the warm, crispy cheese layer was worth every second. Someone asked for the recipe immediately, pencil in hand, which honestly made my whole week. That's when I knew this wasn't just a pantry rescue—it was something worth perfecting.
Ingredients
- Rice Cakes: Eight plain ones form the foundation—look for the ones without added flavoring so the cheese can shine.
- Mozzarella Cheese: Two hundred grams shredded is your melting hero; it gets stretchy and golden in the heat.
- Parmesan Cheese: One hundred grams grated adds that salty, umami punch that makes people ask what the secret ingredient is.
- Olive Oil: Two tablespoons brushed on top encourage browning and keep things from drying out.
- Dried Oregano: One teaspoon ties everything back to the kitchen smells you grew up with.
- Garlic Powder: Half a teaspoon rounds out the savory profile without overpowering.
- Black Pepper: A quarter teaspoon for subtle heat that builds as you eat.
- Chili Flakes: Optional, but a quarter teaspoon adds a tiny kick that people either expect or love discovering.
- Fresh Parsley: Two tablespoons chopped, scattered at the end, because everything looks better with green on top.
Tired of Takeout? 🥡
Get 10 meals you can make faster than delivery arrives. Seriously.
One email. No spam. Unsubscribe anytime.
Instructions
- Get Your Oven Ready:
- Preheat to 200°C and line a baking sheet with parchment paper so nothing sticks and cleanup is blessedly easy.
- Build Your Base Layer:
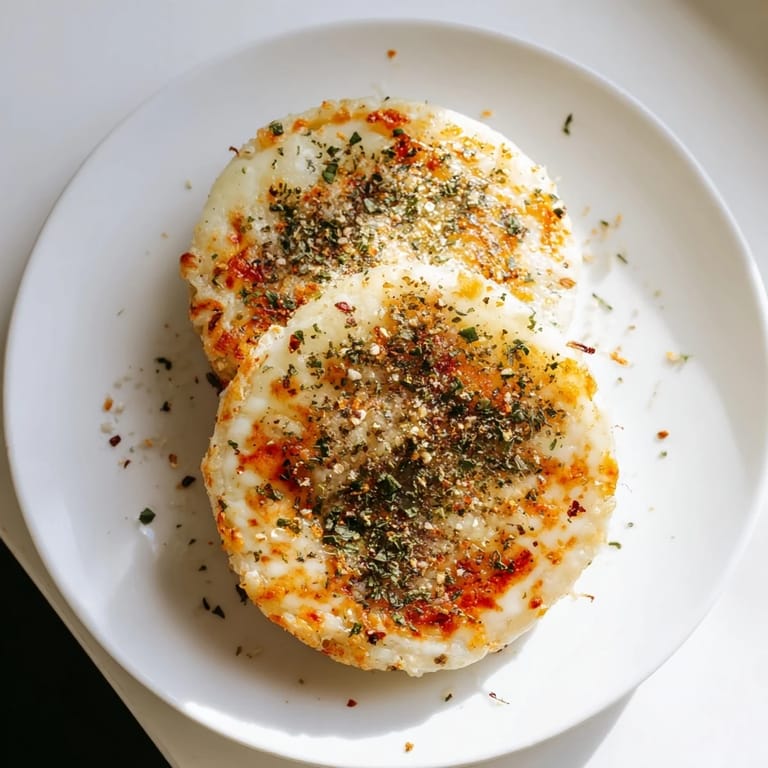
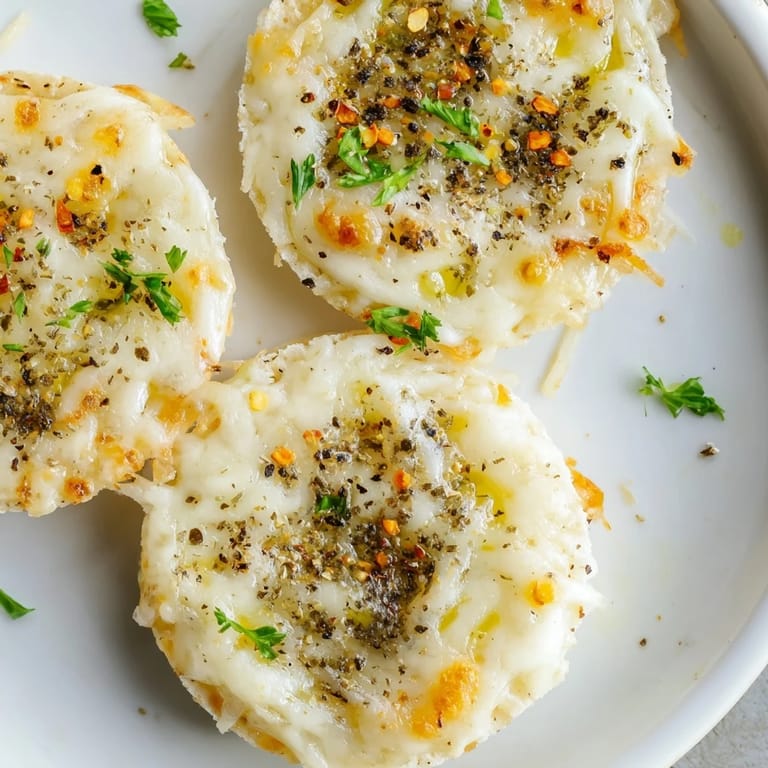
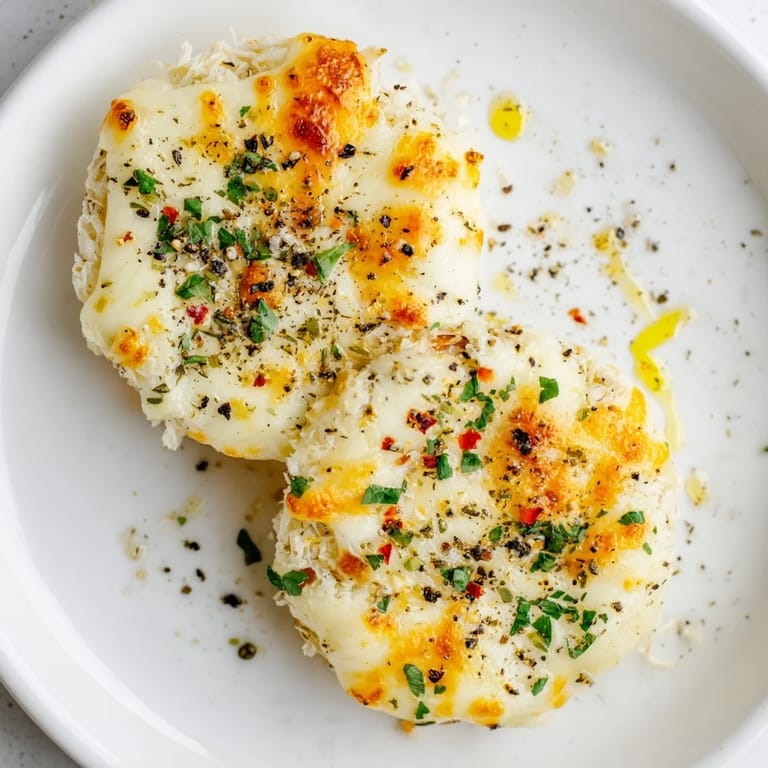
- Arrange four rice cakes on the sheet, then sprinkle each with a generous handful of mozzarella and a light dusting of parmesan. Be generous—the cheese is what makes this work.
- Stack and Press:
- Place another rice cake on top of each, pressing down gently to help them settle together. They won't fuse, but the pressure helps them stay stacked while baking.
- Add the Finishing Layer:
- Brush the tops with olive oil, then scatter the remaining cheeses, oregano, garlic powder, black pepper, and chili flakes across the top. Don't hold back on the toppings—they'll brown beautifully.
- Bake Until Golden:
- Slide them into the oven for 15 to 20 minutes, watching for the cheese to melt and turn golden at the edges. The rice cakes underneath will crisp up while you're not looking.
- Finish with Fresh Flavor:
- Let them cool just long enough to handle, then scatter fresh parsley over the top and serve warm.
 Save
Save There's something quietly special about food that comes together this simply and tastes like you've been practicing it for years. These cheese stacks became the thing people text about, asking if I'm making them again soon. They've earned a permanent spot in my weeknight rotation.
Variations That Work
The beauty of this recipe is how it welcomes experimentation. I've tucked thin slices of tomato or roasted red pepper between the layers on days when I wanted something a little more substantial, and the moisture from the vegetables steams into the cheese beautifully. Switching up the cheese blend—smoked varieties, sharp cheddar mixed with mozzarella, even a touch of gruyère—completely transforms the flavor without changing the technique. The framework stays the same; only your mood and what's in your fridge changes.
Serving and Pairing
These are best eaten warm, when the cheese is still soft and the rice cakes still have that crispy edge. I usually set them out as part of a casual spread or keep them on hand for snacking between meals. A small bowl of marinara or fresh pesto on the side turns them into something people feel like they're getting away with eating, even though they're straightforward and honest food.
Storage and Make-Ahead Tips
You can assemble these entirely before baking and hold them in the fridge for a few hours, then pop them in the oven when you want to eat. They don't reheat as crisply the next day, but they're still good cold the morning after if you find yourself with leftovers. Here's what helps them stay their best:
- Let them cool completely before storing in an airtight container to avoid condensation turning them soft.
- Reheat gently in a 180°C oven for a few minutes if you want to restore some crispness.
- Eat them within a day or two for the best texture, though they're hard to keep around that long anyway.
 Save
Save This recipe exists because pantry staples sometimes surprise you when you're brave enough to try something different. Make these when you need something quick that tastes like it took real thought.
Kitchen Questions
- → What types of cheese work best for these stacks?
Mozzarella and parmesan provide a perfect balance of meltiness and sharp flavor, but blends with cheddar or smoked cheese are great alternatives.
- → Can I make these without an oven?
While baking ensures golden crispiness, you can use a skillet to toast stacks gently, though results will differ.
- → How can I add more flavor to the stacks?
Layering with slices of tomato or roasted red pepper adds depth; herbs like oregano and garlic powder also enhance taste.
- → Are rice cakes the same as puffed rice cakes?
Plain round rice cakes are used here, offering a sturdy base that crisps well when baked with cheese toppings.
- → Is this suitable for a vegetarian diet?
Yes, this dish uses only vegetarian-friendly ingredients such as cheese and herbs with no meat products.