 Save
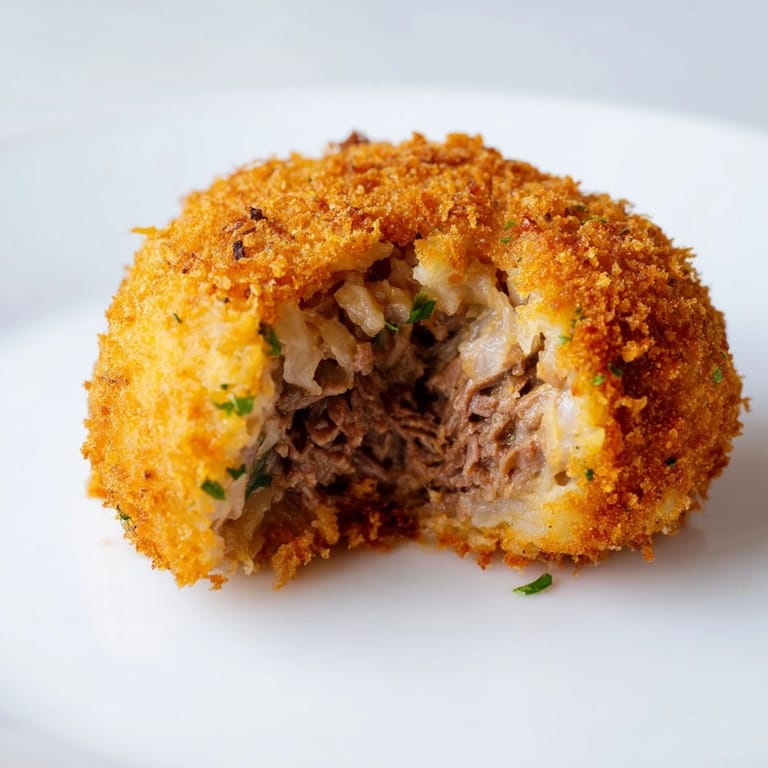
Save My first Dutch croquette arrived on a gray Amsterdam afternoon, handed to me by a vendor at the Albert Cuyp Market who seemed to know exactly what I needed—something warm, something crispy, something that tasted like home to someone else. I bit through that golden shell and discovered the magic: a creamy, savory beef filling that had been simmered and bound with such care that it felt less like a snack and more like a small edible hug. Years later, I set out to recreate that moment in my own kitchen, and what started as curiosity turned into obsession with perfecting the ratio of roux to filling, the temperature of the oil, the exact moment when the breadcrumbs turned that shade of amber. These croquettes became my answer to the question: what do you make when you want to impress someone without making it obvious how much you care?
I made these for a dinner party once when I was trying to prove something—maybe to myself, maybe to my guests—and what I remember most isn't the compliments but the sound of someone's fork hitting the plate as they went back for a third one without asking. That's when I knew the recipe had shifted from being mine to being ours, the kind of dish that gets passed around tables and loved without pretense.
Ingredients
- Stewing beef (250 g): Chuck or shoulder cuts work best because they break down into tender, flavorful strands; cheaper cuts mean more flavor here.
- Beef broth (500 ml): Use homemade if you have it, but quality store-bought works just fine and saves time.
- Bay leaf: One leaf is enough; more would overpower the subtle filling.
- Onion (1 small): This goes into the filling after the beef is cooked, adding sweetness and body without any rawness.
- Unsalted butter (40 g + 1 tbsp): Keep it unsalted so you control the salt balance; salted butter can throw off the seasoning.
- All-purpose flour (40 g + 100 g): The first amount makes your roux base; the second is for your breading station.
- Whole milk (150 ml): Whole milk creates that silky texture; lower-fat versions won't coat your mouth the same way.
- Nutmeg (1/2 tsp, ground): Just a whisper of this spice transforms the filling from good to unforgettable.
- Fresh parsley (1 tbsp, chopped): Optional but worth it for a hint of brightness that cuts through the richness.
- Eggs (2 large): These bind your breadcrumb coating and make it golden.
- Fine dry breadcrumbs (150 g): Panko or Dutch paneermeel works best; regular breadcrumbs won't give you the same crunch.
- Neutral oil: Sunflower or canola oil for frying; it won't compete with the filling's flavor.
Tired of Takeout? 🥡
Get 10 meals you can make faster than delivery arrives. Seriously.
One email. No spam. Unsubscribe anytime.
Instructions
- Simmer the beef until it shreds:
- Combine beef, broth, bay leaf, and salt in a saucepan and bring to a rolling boil, then lower the heat to a gentle bubble. Let it cook for about an hour—you'll know it's done when a fork tears through the meat without resistance. Reserve 200 ml of that flavorful cooking liquid and discard the bay leaf.
- Build the base with onion and beef:
- Melt 1 tablespoon of butter in a skillet over medium heat and soften the chopped onion until it's completely translucent, about 3 minutes. Stir in your shredded beef and let it warm through, then taste and adjust the seasoning—this is your last chance to balance the salt and pepper.
- Create the roux foundation:
- In a clean saucepan, melt 40 grams of butter over low heat, then whisk in 40 grams of flour and keep stirring for 2 minutes so it cooks out any raw flour taste. Slowly pour in the reserved beef broth and milk while whisking constantly; this is where patience matters because rushing creates lumps.
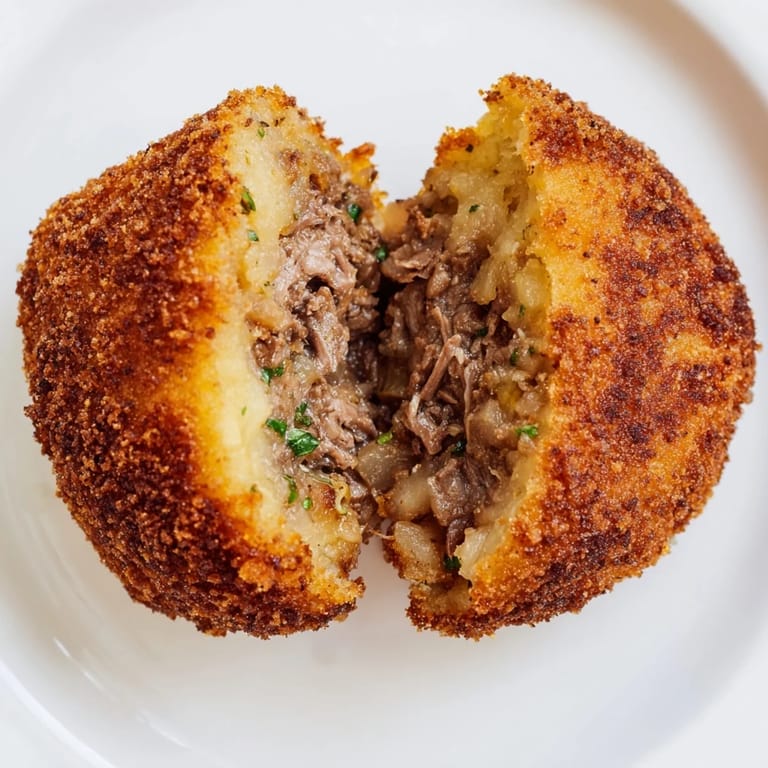
- Combine everything into ragout:
- Pour the beef and onion mixture into your roux and stir until it's uniform and thick. Add the nutmeg and parsley, taste one more time, then spread it into a shallow dish and refrigerate for at least an hour—it needs to set firm enough to hold its shape when you form it.
- Shape the croquettes:
- Working with chilled filling, use your hands to roll each portion into a cylinder about 8 centimeters long; the cold filling should hold together without sticking to your fingers. If it feels too soft, pop it back in the fridge for 15 minutes.
- Set up your breading station:
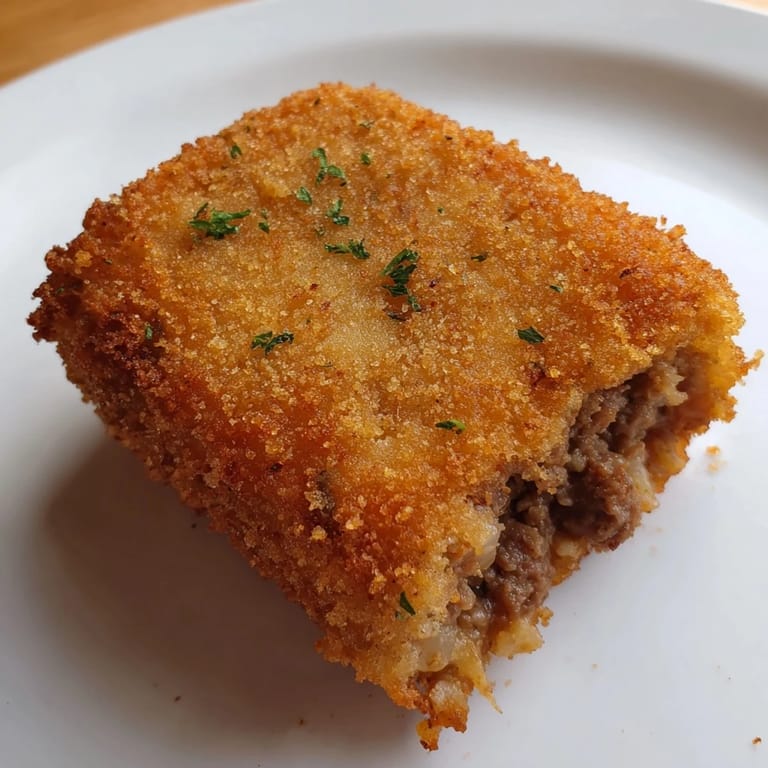
- Arrange three shallow bowls with flour in the first, beaten eggs in the second, and breadcrumbs in the third. Roll each croquette in flour to dry it slightly, dip it in egg to make it sticky, then roll it in breadcrumbs until completely coated. For extra crunch, repeat the egg and breadcrumb step.
- Fry until golden:
- Heat your oil to 180°C (350°F)—use a thermometer because this temperature matters; too cool and they get soggy, too hot and the outside burns before the inside heats through. Fry in batches for 3 to 4 minutes, turning once, until they're that perfect shade of golden brown, then drain on paper towels.
- Serve while they're still warm:
- Eat them immediately with mustard for dipping, or let them cool slightly if you prefer a firmer bite.
 Save
Save There's something almost meditative about the process once you understand it—the sound of oil crackling when you slide in the croquette, the way steam escapes from inside, the exact moment the outside shifts from light tan to deep gold. I realized these aren't just appetizers; they're edible proof that patience and precision can taste like comfort.
Making Ahead and Freezing
The genius of croquettes is that you can prepare them completely through the breading step, freeze them on a tray, then fry them straight from frozen whenever hunger strikes. Add just 1 to 2 extra minutes to the frying time, and nobody will know they didn't just come together fresh. I keep a batch in my freezer for those evenings when I want something special but have no energy left.
Variations Worth Trying
Once you master the basic beef version, you start seeing possibilities everywhere: substitute half the beef with veal for a more delicate flavor, add a teaspoon of Dijon mustard to the filling for subtle tang, or stir in a handful of finely diced mushrooms that have been cooked down until they're almost a paste. The filling is forgiving as long as you respect its thickness and seasoning.
Serving and Pairing Ideas
Serve these hot from the oil with a cold pilsner or pale lager on the side, and watch how the beer cuts through the richness of the filling while somehow making it taste even better. A crisp mustard for dipping is essential, though some people swear by a tiny dollop of mayo mixed with sriracha. Dutch tradition pairs them with fries and a side of pickled onions, but I've also seen them work beautifully as part of a charcuterie spread or on their own as a show-stopping appetizer.
- Serve immediately while the outside is still crackling and the inside is molten.
- Cold croquettes are still good, but they lose that crucial textural contrast that makes them special.
- Make extra because somehow there are never leftovers, even when you think you've made enough.
 Save
Save These croquettes remind me why I cook: to create moments where food becomes an excuse for connection, where something fried and crispy becomes a small edible love letter. Make them once, and you'll find yourself making them again and again.
Kitchen Questions
- → What cut of beef works best for the filling?
Stewing cuts like chuck are ideal, as they become tender and flavorful after slow simmering.
- → How can I achieve the crispy crust?
Coat each croquette with flour, dip in beaten eggs, then breadcrumbs. Repeat the egg and breadcrumb step for extra crunch.
- → Can these croquettes be prepared ahead of time?
Yes, you can shape and bread them, then freeze prior to frying. Fry from frozen, adding extra cook time as needed.
- → What oil should be used for frying?
Neutral oils with high smoke points, like sunflower or canola oil, work best for deep frying.
- → How is the creamy filling made?
By combining shredded beef with a roux of butter and flour, then adding beef broth, milk, nutmeg, and optional parsley, cooked until thick.