 Save
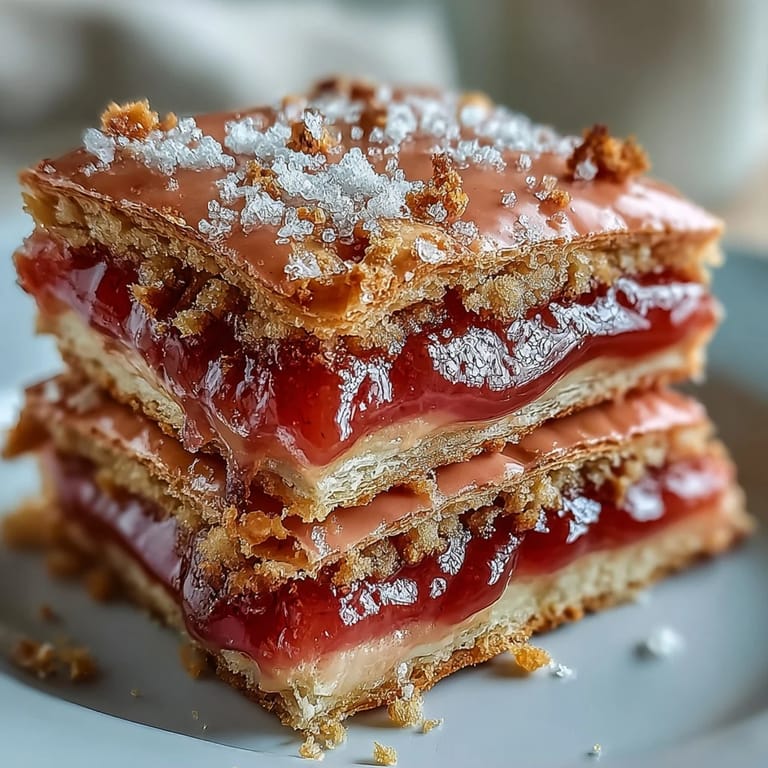
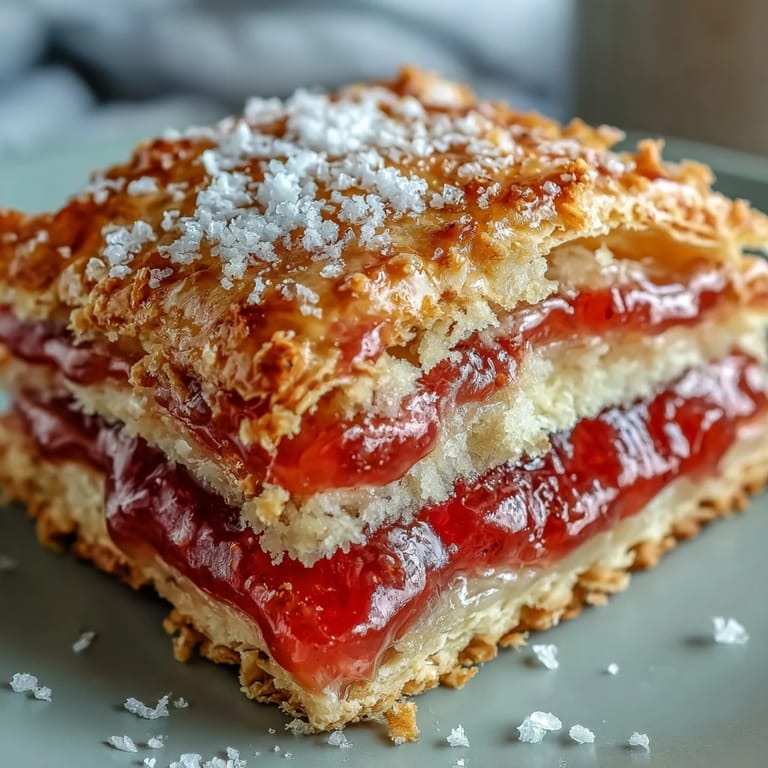
Save The afternoon I discovered that guava and cream cheese belong together on a flaky pastry, I was rummaging through my pantry looking for something to salvage a disappointing baking day. A block of cream cheese caught my eye next to a jar of guava paste I'd picked up months earlier on a whim, and suddenly the kitchen filled with the smell of possibility. These pop tarts came together almost by accident, but they tasted like something I'd been craving my whole life without knowing it.
My neighbor knocked on the door mid-morning while I was proofing these beauties, drawn by the butter smell wafting down the hallway. She took one bite and went completely quiet—that kind of quiet that means something just shifted her day. By the time she left, I'd wrapped up four for her to take home, and honestly, watching her face made the whole messy process worthwhile.
Ingredients
- All-purpose flour (2 1/4 cups): The foundation of your pastry, and keeping it cold means you'll get those gorgeous flaky layers that make the whole thing sing.
- Unsalted butter (1 cup, cold and cubed): This is where the magic happens—cold butter creates steam pockets that make the pastry shatter. Do not skip the cold part.
- Ice-cold water (1/3 cup): Temperature matters more than you'd think; warm water will melt your butter and ruin the texture before you even bake.
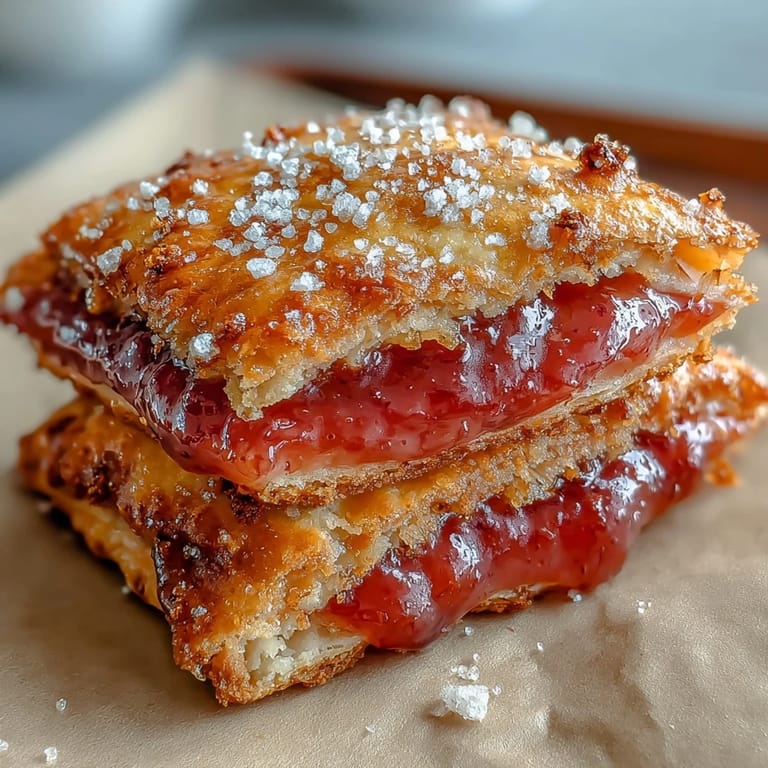
- Guava paste (3/4 cup): Use the thick, dense kind rather than thin jam, or your filling will leak everywhere and you'll learn this lesson the hard way like I did.
- Cream cheese (4 oz, softened): This mellows the tartness of the guava and adds a luxurious richness that elevates the whole pastry.
- Powdered sugar (2 tablespoons for filling, 1 cup for glaze): The subtle sweetness prevents the filling from being too tart while the glaze gives you that final polished touch.
- Vanilla extract (1/2 teaspoon each for filling and glaze): A whisper of vanilla deepens the flavors without announcing itself.
- Egg wash (1 large egg): This creates that burnished golden exterior and helps the rectangles seal together.
- Milk (2–3 tablespoons for glaze): Adjust this to get your glaze to the consistency you want—thinner for drizzling, thicker for spreading.
- Food coloring (optional): A touch of pink or red makes the glaze look like it was made intentionally for something special.
Tired of Takeout? 🥡
Get 10 meals you can make faster than delivery arrives. Seriously.
One email. No spam. Unsubscribe anytime.
Instructions
- Build your pastry foundation:
- Whisk together the flour, sugar, and salt in a large bowl, then add your cold cubed butter. Using your pastry blender or fingertips, work the butter into the flour until everything looks like coarse breadcrumbs—don't overmix or you'll end up with tough pastry.
- Bring the dough together:
- Sprinkle the ice water over the mixture and stir gently with a fork until the dough just comes together. You want it shaggy and barely held together at this point.
- Rest and chill:
- Divide the dough in half, flatten each into a disk, wrap in plastic, and let them chill for at least 30 minutes—this relaxes the gluten and keeps your pastry from shrinking in the oven.
- Prepare the filling:
- While the dough chills, blend your softened cream cheese with powdered sugar and vanilla until perfectly smooth. No lumps allowed here.
- Roll and cut:
- On a lightly floured surface, roll one dough disk to about 1/8-inch thickness and cut into eight rectangles roughly 3 by 4 inches. You can use a fluted wheel for fancy edges if you're feeling it.
- Fill with care:
- Place a teaspoon of guava paste and a teaspoon of cream cheese mixture in the center of four rectangles, leaving a clear border so the edges can seal. Less filling seems less exciting, but too much and you'll have a blowout in the oven.
- Seal the edges:
- Brush the borders with beaten egg, top with the remaining rectangles, press the edges firmly to seal, then crimp with a fork. This creates both a decorative edge and an actual seal.
- Chill before baking:
- Transfer to a parchment-lined baking sheet and let them rest in the fridge for 10 minutes so the pastry stays flaky and doesn't shrink.
- Egg wash and vent:
- Preheat your oven to 375°F, brush the tops with egg wash for that golden finish, and use a fork to prick a few holes so steam can escape evenly.
- Bake to golden perfection:
- Bake for 22 to 25 minutes until the pastry is deeply golden—the color is your cue that they're done. Let them cool completely before glazing or the glaze will melt right off.
- Create your glaze:
- Whisk together powdered sugar, milk, and vanilla until smooth and pourable. Add food coloring if you want that Instagram-worthy pink hue, then drizzle or spread over the cooled pop tarts and let it set.
 Save
Save These pop tarts have become my go-to when someone needs comfort food that feels both nostalgic and surprisingly sophisticated. There's something about handing someone a warm one dusted with glaze that makes them feel genuinely cared for.
The Flaky Pastry Secret
The difference between a mediocre pastry and a transcendent one lives in those moments when you're tempted to add warmth and you don't. Keeping everything cold—your butter, your water, even your hands if you're the type to get warm easily—creates tiny pockets of steam during baking that puff the layers apart. One afternoon I got impatient and used room-temperature water, and the result was dense and disappointing; now I'm a devotee of the ice bath.
Playing with the Filling
While guava and cream cheese is my favorite combination, this pastry can hold any filling you dream up. I've tested strawberry jam with a pinch of lemon zest, apricot with a hint of cardamom, and even a spiced pumpkin cream that disappeared from a plate faster than I could photograph it. The ratio stays the same—just make sure your filling isn't too wet or you'll end up with soggy edges.
Storage and Make-Ahead Magic
These keep beautifully in an airtight container for three days, though they're honestly most magical within the first 24 hours when the pastry is still flaking. You can also assemble them the night before and bake them fresh in the morning—just skip the final chill and add a minute or two to the baking time since they'll be coming straight from the fridge.
- Store unglazed pop tarts in an airtight container, adding the glaze fresh right before serving if you want maximum shine.
- For a quick breakfast, you can freeze unbaked pop tarts and bake them directly from frozen, adding 2–3 minutes to the baking time.
- Reheating in a 300°F oven for 5 minutes brings back the flakiness if they've softened overnight.
 Save
Save These pop tarts remind me that some of the best things come from happy accidents in the kitchen. Make them once and you'll understand why homemade pastry deserves the small effort it takes.
Kitchen Questions
- → Can I use fresh guava instead of paste?
Fresh guava isn't recommended as it contains too much moisture and will make the pastry soggy. Guava paste or thick jam provides the concentrated sweetness and proper texture needed for the filling.
- → How should I store these pop tarts?
Store in an airtight container at room temperature for up to 3 days. For longer storage, freeze unglazed pastries in a freezer bag for up to 3 months. Thaw at room temperature and glaze before serving.
- → Can I make the dough ahead of time?
Yes, the dough can be prepared and refrigerated for up to 2 days before rolling and baking. You can also freeze the dough disks for up to 3 months. Thaw overnight in the refrigerator before using.
- → What can I substitute for cream cheese?
Mascarpone cheese makes an excellent substitute with a slightly sweeter flavor. For a dairy-free version, use vegan cream cheese alternatives. The filling will still be creamy and delicious.
- → Why do I need to chill the dough?
Chilling relaxes the gluten and firms up the butter, which prevents the pastry from shrinking during baking and ensures those coveted flaky layers. The brief chilling after assembly helps the edges seal better.
- → Can I bake these without the glaze?
Absolutely! The pastries are delicious on their own. You can also brush them with simple syrup while warm for a subtle shine, or sprinkle with coarse sugar before baking for a crunchy topping.