 Save
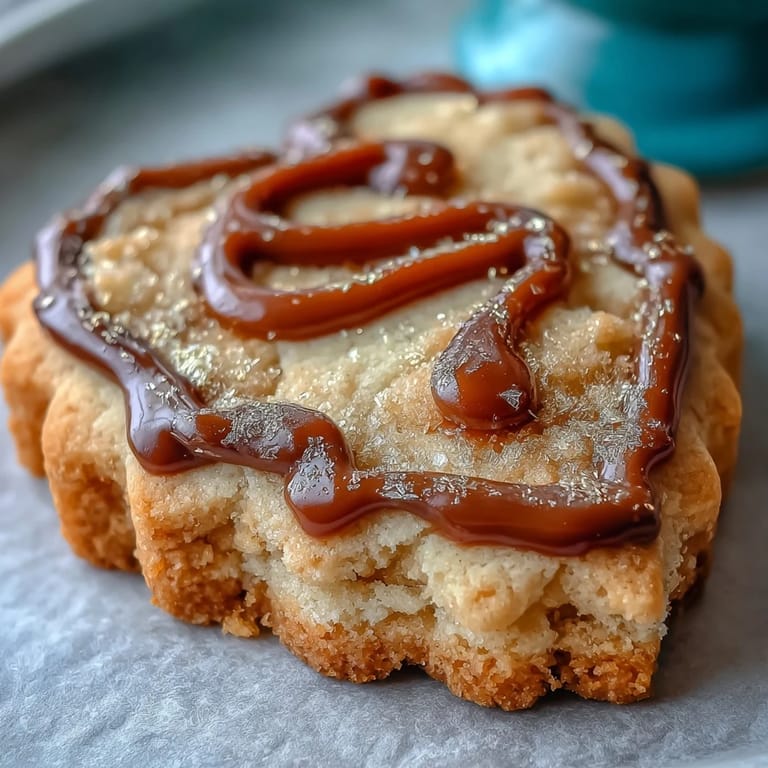
Save The first time I gazed at a tray of Taurus zodiac sugar cookies sparkling with gold accents, I realized how baking becomes its own miniature celebration. My kitchen was filled with the mellow perfume of vanilla and butter, a scent that always pauses me mid-whisk. There was something playful about shaping each cookie by hand, watching swirls and constellations emerge from the dough and icing. Nowadays, the anticipation of unveiling each decorated cookie sometimes feels as thrilling as spotting a rare star in the night sky. The best part—no one ever guesses how fun it is to turn the zodiac into edible art until they see the golden brushstrokes dry in the afternoon light.
One rainy weekend, a good friend (a proud Taurus, naturally) challenged me to bring the zodiac to life through cookies for her birthday. Powdered sugar drifted through the air and my fingertips sparkled with edible gold as we piped constellations and stubborn bull horns on our batches. There were more laughs over icing mishaps than I expected, but each cookie turned into its own tiny masterpiece. By the end, we were surrounded by a constellation of sweet treats and crumbs we didn’t mind. That afternoon, these cookies transformed from a simple recipe to a shared adventure in creativity and laughter.
Ingredients
- All-purpose flour: This forms the backbone of the cookie—measure lightly for the most tender results and always sift to prevent lumps.
- Unsalted butter, softened: Creaming till it’s fluffy brings out the rich, buttery base that all good sugar cookies need; cold butter just won’t blend as neatly.
- Granulated sugar: For classic sweetness and an ever-so-slight crunch at the edges; I found superfine sugar dissolves fastest for the smoothest dough.
- Large egg: Adds structure and shine, and room-temperature eggs always mix in better for an even, cohesive batter.
- Pure vanilla extract: The tiniest splash deepens the cookie’s aroma; real extract always outshines imitation for richness.
- Almond extract (optional): A single drop takes the flavor from basic to nuanced, but skip if you need nut-free—lemon zest makes a bright trade.
- Salt: A little balances the sweet, so don’t be tempted to skimp.
- Powdered sugar, sifted: For that luscious royal icing—always sift or you’ll end up with frustrating lumps during decorating.
- Egg whites (or meringue powder + water): Whipped to soft peaks, they give royal icing its signature gloss—meringue powder is a gentler option for anyone worried about raw egg.
- Lemon juice: Just a touch sharpens the icing and brightens up the sweetness.
- Vanilla extract (for icing): This rounds out the flavor so the icing doesn’t taste chalky.
- Edible gold luster dust: The finishing flourish—look for a reputable brand for best shine, and keep it away from steam to avoid clumping.
- Clear alcohol (vodka or lemon extract): To activate the luster dust into paint; evaporates quickly, leaving only shimmer.
Tired of Takeout? 🥡
Get 10 meals you can make faster than delivery arrives. Seriously.
One email. No spam. Unsubscribe anytime.
Instructions
- Mix and Chill the Dough:
- Use your mixer to cream the softened butter and sugar until it turns pale and billowy—this always feels like the magic starting. Drop in the egg and extracts, then blend until you no longer see streaks; sprinkle in salt with your flour and fold it all together until just combined, then pat into discs and chill them for at least 30 minutes to keep the cookies crisp.
- Roll and Shape:
- Pull one dough disc at a time and roll it gently on a lightly floured counter, aiming for a quarter-inch thickness. Cut Taurus horns or constellation shapes with your zodiac cutters, gathering the scraps to reroll and shape until all dough is used.
- Bake the Cookies:
- Preheat your oven to 350°F and line your pans with parchment for effortless lifting later. Place cookies about an inch apart, then bake for 10 to 12 minutes—watch closely, as the edges should just barely turn gold.
- Whip Up the Royal Icing:
- Beat egg whites (or meringue powder and water) until frothy, then gradually add powdered sugar to form a thick, glossy icing. Blend in lemon juice and vanilla, reserving a portion for gold detailing, and keep your icing covered to prevent crusting.
- Decorate and Gild:
- Pipe outlines and flooded centers on each cookie, letting the icing dry for at least 2 hours. After mixing gold luster dust and clear alcohol, thinly paint on Taurus symbols or metallic accents and let the brilliance set before boxing.
- Box and Present:
- Once cookies are completely dry, arrange them in parchment-lined gift boxes—don’t forget a Taurus-inspired card or extra green tissue for a symbolic touch.
 Save
Save The day I delivered a finished Taurus cookie box to my cousin, her eyes lit up not just for the cookies, but for the symbolic effort behind every gilded detail. Sometimes, what makes a dessert memorable isn't just the taste—it’s the joy you bundle inside the box with each hand-painted swirl.
Choosing Your Cookie Shapes
I discovered that Taurus-themed cookie cutters aren’t essential—a simple circle becomes a moon or can be piped into a bold zodiac symbol. Don’t hesitate to use your favorite star or heart shapes, then add horns or constellations freehand. The cookies look just as charming with signature decorations brushed on top. Customizing each batch makes every box feel distinct. You’ll soon find your favorite design to repeat for every Taurus friend you know.
Mastering Royal Icing Like a Pro
My first few tries with royal icing left me with clumps and too-runny mistakes, so don’t worry if your first batch isn’t flawless. Consistency is everything: thick for lines, slightly thinner for flooding. Always cover your icing with plastic wrap pressed to the surface so it doesn’t crust. Painting with gold is best done with a fine, dry brush for clean lines. Never be afraid to practice on a spare cookie—it’s an edible canvas after all.
Tips for Gifting and Presentation
Packing these cookies is half the fun, and I like to layer them with parchment or pretty tissue for a bit of drama when the box opens. Include a handwritten note about Taurus qualities or the story behind your cookies if you’re gifting them for a birthday or celebration. If you’re mailing them, pad generously to avoid golden crumbles upon arrival.
- Let decorated cookies dry at least overnight for safe stacking.
- Add extra gold accents for a luxe look if you want a truly dazzling reveal.
- Check that your cookie box closes snugly so the aroma stays fresh.
 Save
Save However you decorate them, these Taurus cookies have a habit of disappearing faster than any star sign prediction. Bake, gild, and share your own constellation—there’s delight in every crumb.
Kitchen Questions
- → How do I prevent cookies from spreading?
Chill the dough thoroughly before rolling and keep the rolled sheet chilled while cutting. Use properly measured flour, avoid over-creaming butter and sugar, and bake on a cool tray for even spread control.
- → What consistency should royal icing be for flooding?
Flooding icing should be pourable but not runny — about toothpaste consistency. Add tiny amounts of water or meringue powder to adjust, then test on a plate to ensure it smooths within 20–30 seconds.
- → How do I make edible gold paint for details?
Mix edible gold luster dust with a few drops of clear alcohol (vodka) or lemon extract to form a paintable paste. Use a fine brush to apply thin layers once the base icing is fully dry.
- → Can I make a vegan version?
Yes — swap in vegan butter and replace eggs with aquafaba. Use meringue powder alternatives designed for vegan use or opt for powdered sugar glazes instead of traditional egg-white royal icing.
- → How long will decorated cookies keep?
When fully dry and stored in an airtight container, decorated sugar cookies keep for about 5–7 days at room temperature. For longer storage, separate layers with parchment and keep in a cool, dry place.
- → How to avoid cracking when painting gold?
Ensure the flood icing is completely dry (several hours or overnight) before painting. Thin the gold paint properly and apply multiple light layers rather than one heavy coat to prevent cracking.