 Save
Save My abuela kept a jar of guava paste on her kitchen shelf like it was liquid gold, and one afternoon when I was helping her bake, she pressed her thumb into butter-soft dough and whispered that this was the easiest way to make someone smile. Those little thumbprints filled with sunset-colored jam became my favorite excuse to spend time in her kitchen, watching her weathered hands create something so elegant and simple. Now when I make torticas de guayaba, the smell of butter and vanilla takes me right back to that moment of quiet contentment.
I made these for a potluck once where everyone brought store-bought desserts, and watching people's faces light up when they bit into the buttery dough and tasted that bright guava center reminded me why homemade matters. A woman asked for the recipe three times that evening, and I knew right then these cookies had earned their place in my regular rotation.
Ingredients
- Unsalted butter (1 cup, softened): Room temperature butter creams into the sugar more easily and gives you that tender, melt-in-your-mouth texture that makes people pause mid-chew.
- Granulated sugar (2/3 cup): This amount keeps the cookies delicate without being cloyingly sweet, letting the guava flavor shine through.
- Egg yolk (1 large): The yolk alone adds richness without toughening the dough like a whole egg would.
- Vanilla extract (1 teaspoon): Choose pure vanilla if you can—the difference in flavor is worth it, and it pairs beautifully with tropical guava.
- All-purpose flour (2 cups): Don't pack it into the measuring cup; spoon it in and level it off so your cookies stay tender.
- Salt (1/4 teaspoon): This tiny amount deepens the butter flavor and balances the sweetness without tasting salty.
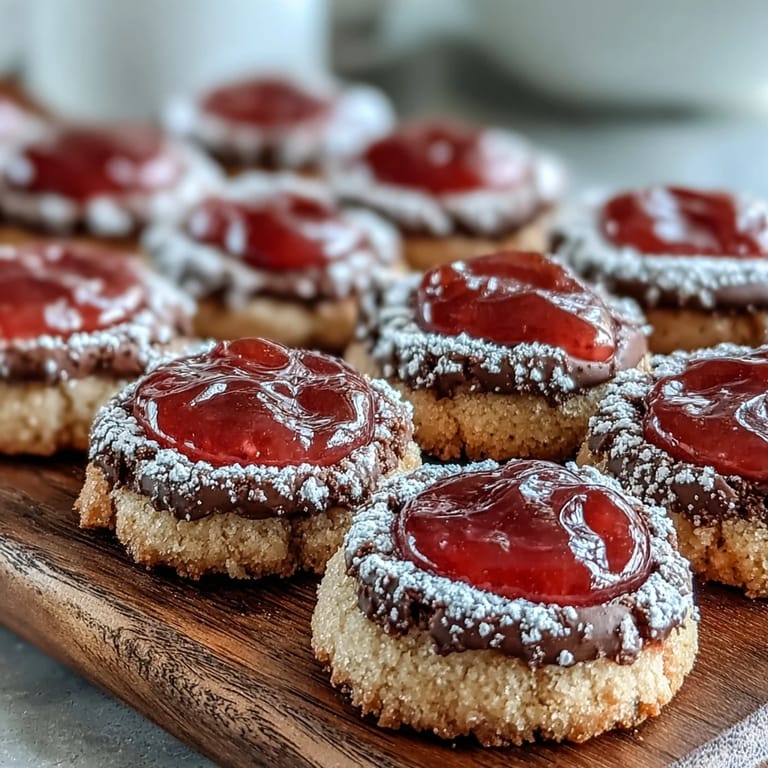
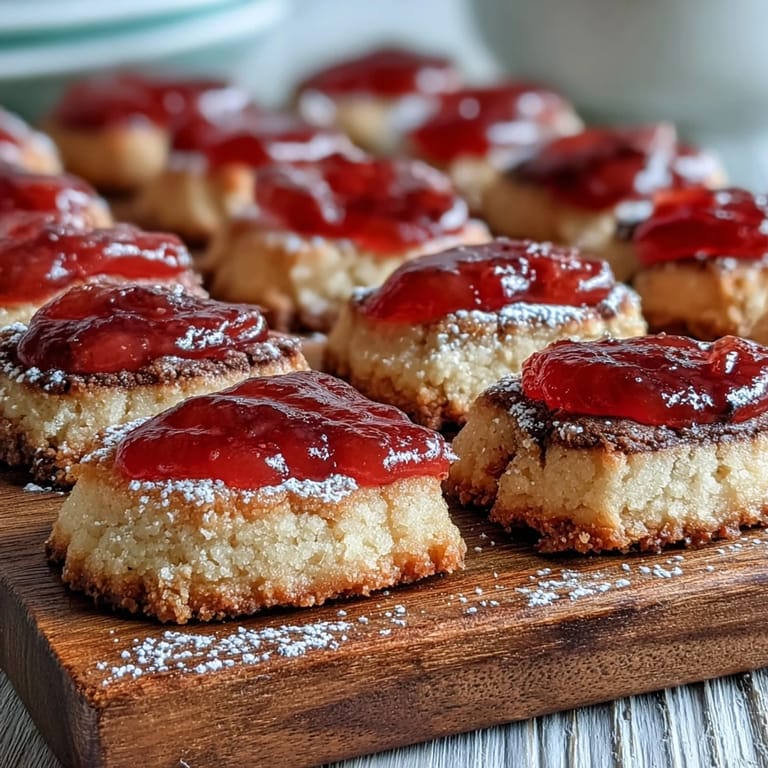
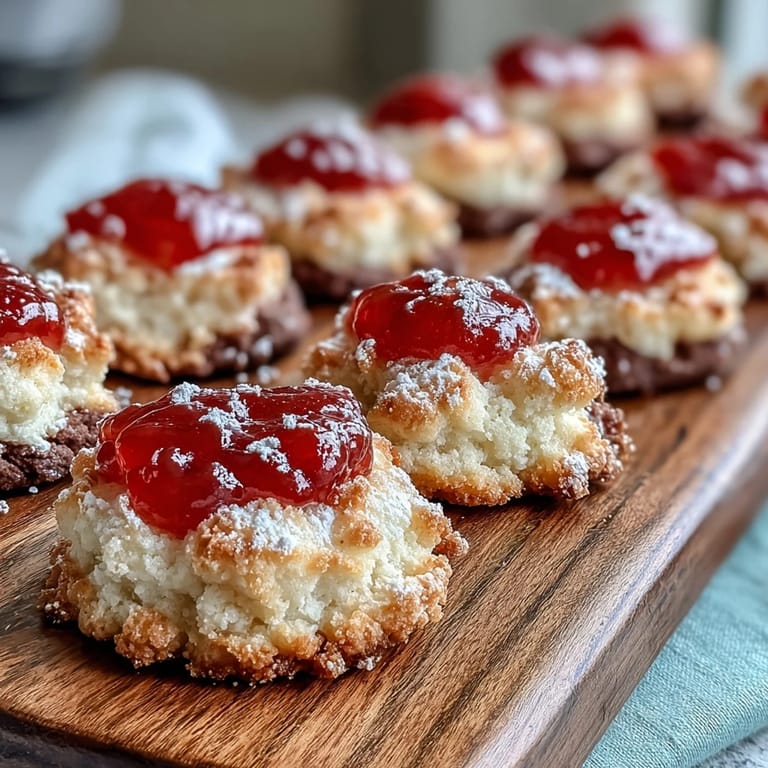
- Guava jam or paste (1/2 cup, softened): If your paste is stiff, warm it gently so it spreads easily into each thumbprint without breaking the cookie.
- Unsweetened cocoa powder (2 tablespoons, optional): For the chocolate variation, swap out two tablespoons of flour with cocoa to create a sophisticated twist.
Tired of Takeout? 🥡
Get 10 meals you can make faster than delivery arrives. Seriously.
One email. No spam. Unsubscribe anytime.
Instructions
- Prepare your workspace:
- Preheat the oven to 350°F and line your baking sheet with parchment paper so cleanup is quick and your cookies won't stick. This five-minute setup keeps you from rushing later when your hands are full of dough.
- Cream butter and sugar:
- Beat the softened butter with sugar until it looks pale, fluffy, and almost cloud-like—this takes about three minutes with an electric mixer. This aeration creates cookies that are tender rather than dense.
- Add richness:
- Mix in the egg yolk and vanilla, beating until everything is smooth and incorporated. The mixture should look creamy and unified.
- Bring the dough together:
- Gradually add your flour and salt, mixing just until a soft dough forms—don't overmix or your cookies will be tough. If you're making the chocolate version, replace two tablespoons of flour with cocoa powder and blend it in evenly.
- Shape and indent:
- Scoop tablespoon-sized portions, roll them into balls, and space them two inches apart on your prepared sheet. Use your thumb or the back of a spoon to press a deep indentation into each center—make it generous because the jam will sink slightly as it bakes.
- Fill with guava:
- Drop about half a teaspoon of softened guava jam into each thumbprint, working quickly so the dough stays cool. You want enough filling to be flavorful but not so much that it spills over the sides.
- Bake until golden:
- Bake for twelve to fourteen minutes, watching until the edges just begin to turn golden—you want the centers to stay tender and pale. Pull them out when they still look slightly underbaked because they'll continue cooking on the hot sheet.
- Cool and transfer:
- Let the cookies rest on the baking sheet for five minutes so they firm up enough to move without breaking, then transfer them to a wire rack to cool completely. This resting period is crucial for keeping them in one piece.
 Save
Save There was a morning when my daughter helped me make these, and she carefully filled each thumbprint with such concentration, her tongue poking out slightly as she worked. When we pulled them from the oven and she took that first bite, her eyes closed and she said, 'This tastes like happy,' and I realized these little cookies had just become part of our story together.
The Magic of the Chocolate Variation
Swapping two tablespoons of flour for unsweetened cocoa powder transforms these into something more sophisticated without any extra fuss. The chocolate deepens the buttery dough and creates an interesting contrast with the bright guava—it's like wearing a dark coat over a summer dress. I make half chocolate and half vanilla in every batch because I love having both options, and honestly, the chocolate version converts skeptics who think they don't want fruit-filled cookies.
Guava Filling Secrets
The filling makes or breaks these cookies, so it's worth finding good guava paste or jam that tastes like actual guava. Some commercial pastes lean too sweet or taste vaguely tropical without character; test it on your finger before committing. You can also experiment with raspberry or apricot preserves if guava isn't available, though something about that tangy tropical flavor against the sweet butter dough feels irreplaceable.
Finishing Touches and Storage
Once these cookies are completely cool, a light dusting of powdered sugar adds a café-quality finish and catches the light beautifully on a plate. Store them in an airtight container with parchment between layers so they don't stick to each other, and they'll stay fresh for up to five days—though they rarely last that long in my house.
- Warm these cookies gently in the oven for two minutes before serving if you want them to taste freshly baked.
- If you're making them for a gift, stack them in a pretty box lined with tissue paper because they deserve that kind of presentation.
- The dough freezes beautifully, so you can prepare it ahead and bake fresh cookies whenever you need them.
 Save
Save These torticas are proof that the simplest recipes often carry the biggest flavors and the warmest memories. Make a batch and discover why this Caribbean tradition has managed to charm everyone who tries it.
Kitchen Questions
- → What makes torticas de guayaba different from regular thumbprint cookies?
These Cuban-style cookies specifically use guava jam or paste as the filling, which provides a unique tropical flavor profile that's both sweet and tangy. The dough is particularly buttery and delicate compared to American versions, and they're traditionally dusted with powdered sugar after baking.
- → Can I use fresh guava instead of jam or paste?
Fresh guava doesn't work well as a filling because it contains too much moisture and would make the cookies soggy. Guava paste or jam has been cooked down to a concentrated consistency that holds its shape during baking. If you only have fresh guava, you'd need to cook it down with sugar to create a jam-like texture first.
- → How do I prevent the guava filling from overflowing during baking?
Make sure to create a deep, wide indentation in each cookie dough ball before filling. Don't overfill—about ½ teaspoon per cookie is ideal. If the jam seems too thick to spoon easily, warm it slightly with a splash of water to thin it out, but don't add too much liquid or it may bubble over.
- → What can I substitute for guava jam?
Raspberry preserves work beautifully as a substitute—they have similar tartness that complements the buttery dough. Apricot preserves also pair well and provide a milder sweetness. For a more tropical alternative, try mango or passion fruit preserves. Just ensure whatever you use has a thick, jam-like consistency.
- → Why is my cookie dough too soft or sticky to handle?
If your dough feels too soft, it may be due to warm butter or kitchen temperature. Chill the dough for 15–20 minutes until firm enough to roll into balls without sticking. You can also lightly flour your hands when rolling. The dough should be soft and pliable but not sticky or melting.
- → How should I store torticas de guayaba?
Store cooled cookies in an airtight container at room temperature for up to 5 days. Place parchment paper between layers to prevent sticking. The buttery dough can soften in humidity, so keep them in a cool spot. You can also freeze unbaked dough balls for up to 3 months—thaw slightly before filling and baking.