 Save
Save The idea for these Mother's Day Flower Pot Brownies came to me one spring afternoon while wandering through an overgrown garden center. The earthy scent of potted soil somehow blended with memories of chocolate desserts at home. Inspired, I imagined desserts so playful they’d make anyone smile. These brownies are a vibrant nod to that day, capturing the whimsy of actual flower pots with the irresistible pull of fudgy brownies and crunchy cookie “dirt.” Sometimes the best recipes are born from moments where creativity collides with curiosity.
The first time I made these, my kitchen felt like an assembly line – one sibling crushed Oreos, another guarded the whipped cream, and I darted between the oven and a cluster of mismatched pots we found in the shed. The house buzzed with chatter about who got which flower and when we’d finally get to dig in. By the end, our fingers were smeared with chocolate, and we were already plotting our next “dirt dessert” garden. Sharing the excitement made everything taste extra sweet.
Ingredients
- Unsalted butter: Melting this gently ensures a rich, even base for dense, luxurious brownies.
- Granulated sugar: For the perfect glossy top and the right level of sweetness.
- Eggs: Beat them in well to create that signature brownie chewiness.
- All-purpose flour: Just enough for structure but not so much the brownies turn cakey.
- Unsweetened cocoa powder: Dutch-process cocoa amps up that deep, chocolatey flavor.
- Baking powder: A pinch keeps the texture light enough for layering.
- Salt: Don’t skip – a little balances all the sweet notes.
- Vanilla extract: Adds warmth and depth, bringing the chocolate alive.
- Oreo cookies: The filling helps the “dirt” stick and gives extra richness.
- Heavy cream: Cold cream whips best – keep it chilled until minutes before beating.
- Powdered sugar: For smooth, billowy whipped cream with no graininess.
- Edible flowers or gummies: Start with violets, pansies, or any colorful edible bloom for a garden vibe.
- Fresh mint leaves: Optional, but the greenery really completes the illusion and adds a hint of freshness.
Tired of Takeout? 🥡
Get 10 meals you can make faster than delivery arrives. Seriously.
One email. No spam. Unsubscribe anytime.
Instructions
- Prep the Flower Pots:
- If you’re using little terracotta pots, line the bottoms with parchment circles to avoid batter leaks and crispy edges.
- Create the Brownie Batter:
- Melt butter in a saucepan over low heat, then whisk in the sugar and vanilla until smooth and fragrant.
- Mix It Up:
- Crack in the eggs one at a time, mixing until the texture turns velvety.
- Add the Dry Ingredients:
- Sift in flour, cocoa, baking powder, and salt, folding everything together gently for a thick, glossy batter.
- Fill the Pots:
- Divide the batter amongst your pots or pour it into a lined pan for later cutting – don’t worry if things look a little rustic.
- Bake and Cool:
- Bake for 20-25 minutes until a skewer comes out with moist crumbs; let them cool fully before layering.
- Make the Oreo Dirt:
- Pulse Oreos (with cream) in a food processor or crush with a rolling pin until they look like fine, edible soil.
- Whip the Cream:
- Whisk heavy cream and powdered sugar to stiff, cloud-like peaks, tasting for sweetness as you go.
- Cut and Layer Brownies (if needed):
- Trim brownies so they snuggle neatly into the pots if you didn’t bake right in them.
- Assemble the Pots:
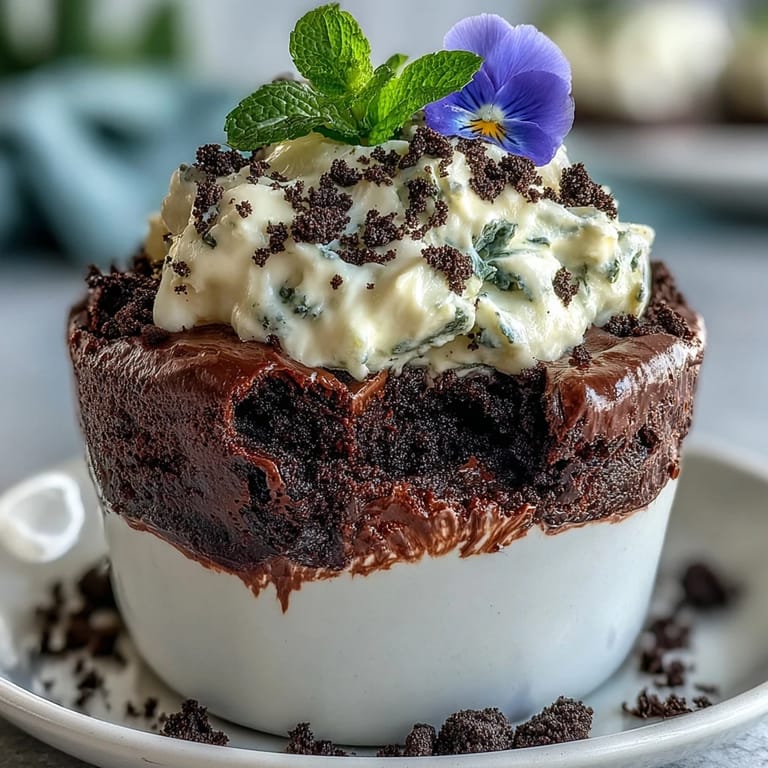
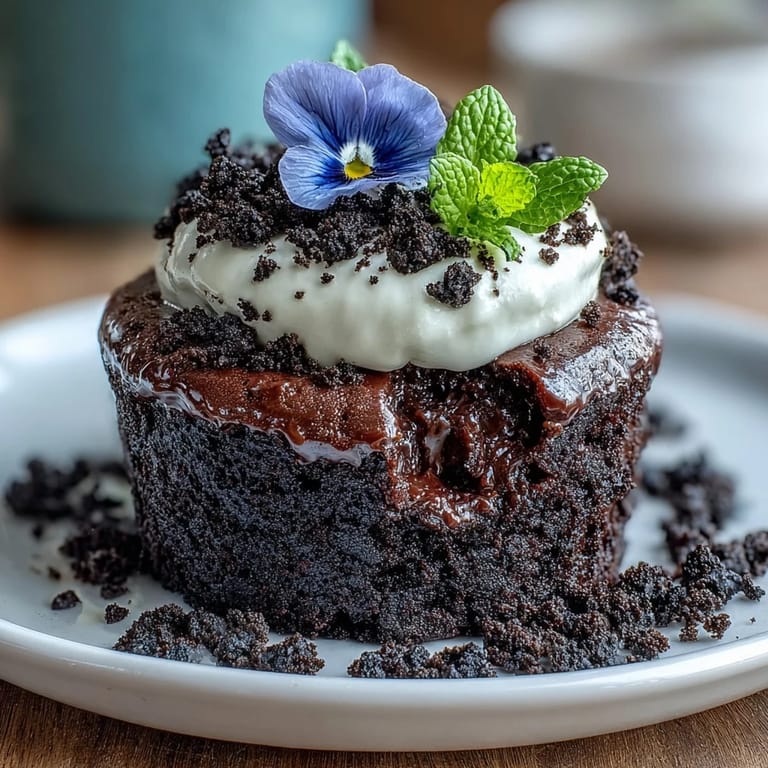
- Spoon whipped cream over each brownie, then scatter a thick layer of Oreo dirt so none of the white shows.
- Decorate:
- Add edible flowers, playful gummies, or fresh mint, arranging them until your pots look like a mini meadow.
- Chill and Serve:
- Chill the finished pots until ready to serve – the anticipation is half the fun.
 Save
Save  Save
Save Watching everyone pause for a moment before digging in – not wanting to ruin their edible flower gardens – is still my favorite part. These little pots always seem to spark laughter and stories around the table, making them more than just a sweet treat.
Making It Extra Special
Once, I tucked tiny paper messages under the brownies so every mom at the table found a surprise note when she finished dessert. Customizing gummy “flowers” to match favorite colors—or even initials—became a running family joke. Small details like those made the brownies feel less like a recipe, and more like a memory.
Playful Swaps and Variations
Don’t be afraid to riff on the classic: swap in a gluten free brownie mix if someone at the table needs it, or trade Oreos for another crisp cookie. Sometimes I scatter chopped nuts or a sprinkle of flaky sea salt into the batter, just to see who notices. Kids tend to love more gummies than flowers, while adults might prefer fragrant herbs and pastel blooms.
A Few Ways to Avoid Brownie Blunders
If you’re prepping with kids, leave extra Oreos for “snacks” so they don’t sneak from your measured pile. Be sure to check if your flower pots are truly oven safe—one cracked on me mid-bake, and I learned to double line ever since. When in doubt, use sturdy ramekins for peace of mind.
- Let the brownies cool all the way so your layers stay neat.
- Edible flowers wilt quickly, so add them just before serving.
- If you use whipped cream, serve soon – it’s at its fluffiest straight from the fridge.
 Save
Save 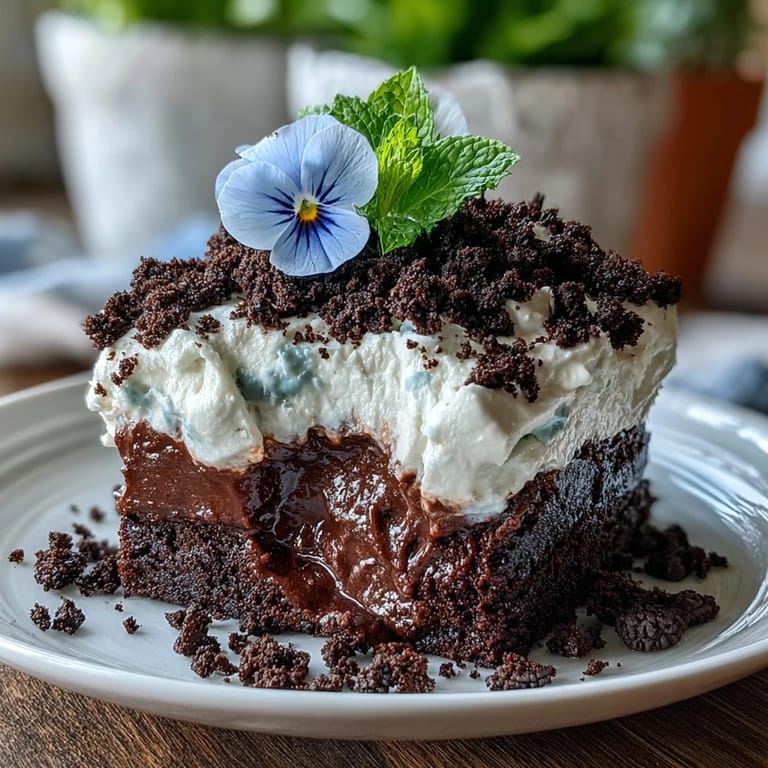 Save
Save I hope these flower pot brownies fill your kitchen with as much joy as they do mine. Dig in, make a mess, and let dessert bloom wherever you are.
Kitchen Questions
- → How long should I bake the brownies in mini pots?
Bake at 175°C (350°F) for 20–25 minutes; a toothpick should come out with moist crumbs. Mini pots may heat faster than a tray, so check a few minutes early.
- → What's the easiest way to make Oreo 'dirt'?
Pulse whole Oreos in a food processor until very fine. Or place in a resealable bag and crush with a rolling pin for a rustic texture.
- → How do I get whipped cream to stiff peaks?
Chill the bowl and beaters, then whip heavy cream with powdered sugar on medium-high speed until the cream holds firm peaks and doesn't slide off a whisk.
- → Can I assemble using a baking tray instead of mini pots?
Yes. Bake in a tray, cool, then cut rounds or squares to fit pots or ramekins. Cutting after baking makes filling multiple pots efficient.
- → Are edible flowers safe to use and where to buy them?
Use only flowers labeled food-safe, such as violets or pansies, from specialty grocers, farmers' markets, or trusted online sellers. Rinse gently before placing.
- → How long can these be stored?
Store chilled in an airtight container for up to 2 days to keep the whipped cream stable and the crumbs from softening too much.