Save
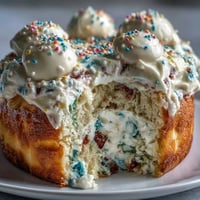
Save My daughter's face when she bit into this cake and candy tumbled out onto her plate—that's the moment I became obsessed with making piñata cakes. She was six, sticky with frosting, completely amazed that dessert could be a surprise. Now whenever Cinco de Mayo rolls around, she reminds me it's time to bake our rainbow layers and fill the center with candy like we're hiding treasure inside something edible.
I brought this to a potluck last May and watched grown adults lean in like kids as I cut the first slice, waiting for the candy surprise. One woman literally said, 'This is better than actual piñatas,' and honestly, she had a point—nobody's getting hit with a stick, and there are no disputes about fairness.
Ingredients
- All-purpose flour (3 cups): The foundation that holds your rainbow layers together; make sure it's sifted or whisk it well so your cake stays tender and light.
- Baking powder and baking soda (2½ tsp and ½ tsp): These are your secret to fluffy layers that rise evenly; don't skip measuring them precisely or you'll end up with dense cake.
- Salt (½ tsp): Just a pinch, but it makes every color pop and balances the sweetness beautifully.
- Unsalted butter (1 cup softened): Room temperature is non-negotiable here; cold butter won't cream properly and you'll have grainy cake.
- Granulated sugar (2 cups): Creamed with butter until light and fluffy, this is where your cake gets its tender crumb.
- Eggs (4 large, room temperature): Cold eggs break the emulsion; let them sit out for 30 minutes before you start, trust me on this.
- Vanilla extract (2 tsp): Use real vanilla if you can; it rounds out the sweetness and makes the cake taste homemade, not from a box.
- Whole milk (1¼ cups, room temperature): Alternating milk and dry ingredients creates moisture without overdeveloping the gluten.
- Gel food coloring (red, orange, yellow, green, blue, purple): Gel works better than liquid because it won't thin your batter; a tiny amount goes a long way, so start small and add more if needed.
- Assorted small candies (1½ cups): This is where you get creative—mini M&Ms, gummy bears, rainbow sprinkles, whatever makes you happy, just avoid anything sticky or hard enough to crack teeth.
- Unsalted butter for frosting (1½ cups softened): Again, room temperature softness is key; if it's too soft it'll be greasy, too cold and it won't beat properly.
- Powdered sugar (5 cups, sifted): Sifting removes lumps and ensures silky frosting; don't skip this step or you'll have grainy frosting no matter how long you beat it.
- Milk for frosting (¼ cup): Adds creaminess and helps the frosting spread smoothly; add it gradually because a little goes a long way.
- Vanilla extract (2 tsp): The second batch keeps your frosting tasting fresh and balanced, not overly sweet.
Tired of Takeout? 🥡
Get 10 meals you can make faster than delivery arrives. Seriously.
One email. No spam. Unsubscribe anytime.
Instructions
- Prep your pans and preheat:
- Set the oven to 350°F and grease your three 8-inch round pans, then line the bottoms with parchment paper so your layers release without sticking or breaking. This step only takes five minutes but saves so much heartbreak.
- Combine dry ingredients:
- Whisk flour, baking powder, baking soda, and salt together in a medium bowl; this distributes the leavening evenly so every layer rises at the same rate. Set aside and forget about it.
- Cream butter and sugar until clouds form:
- Beat softened butter and sugar for about three minutes until it's pale, fluffy, and looks like clouds—this incorporates air that makes your cake tender. You'll know it's ready when you lift the beaters and ribbons fall off.
- Add eggs one at a time like you mean it:
- Drop an egg in, beat for 30 seconds until combined, then repeat; adding them gradually emulsifies the batter so it stays smooth and doesn't curdle. Rushing this step is how you end up with separated, grainy cake.
- Mix in vanilla:
- A quick 30-second beat and you're done; don't overmix or you'll start developing gluten and your cake won't be as tender.
- Alternate dry and wet like a gentle dance:
- Add a third of the flour mixture, beat briefly, then half the milk, beat briefly, then another third flour, then the rest of milk, then the final flour; this keeps the batter smooth and prevents overworking. The key is 'just until combined'—stop as soon as you don't see white streaks.
- Divide and paint your batter rainbow:
- Spoon equal amounts into six bowls and add gel coloring drop by drop, stirring gently until the color is even; remember that gel coloring is concentrated, so you need way less than you think. I usually start with two drops and add more if it's too pale.
- Pour and bake one or two at a time:
- Divide your six colored batters among three pans (two colors per pan, layered gently) or bake in batches if you have fewer pans; smooth the tops with an offset spatula so they bake evenly. Bake for 15 to 18 minutes until a toothpick comes out clean and the cake springs back when you touch it.
- Cool with patience:
- Let layers cool in the pans for 10 minutes so they set enough to handle, then turn them out onto wire racks and cool completely; warm cake is fragile and will crumble when you stack it. This usually takes about an hour, so use that time to make frosting.
- Cut the mystery centers:
- Once completely cool, use a 3-inch round cutter to cut a hole in the center of four of your six layers, leaving the top and bottom layers whole; this creates a cavity for your candy surprise. Do this gently and wiggle the cutter slightly to help it release cleanly.
- Beat frosting until it's silky:
- Cream butter until it looks pale and fluffy, then gradually add sifted powdered sugar, milk, vanilla, and salt while beating; this takes about five minutes and it's worth every second because homemade frosting just tastes better. Stop as soon as it's smooth and fluffy, about the texture of clouds.
- Stack your rainbow masterpiece:
- Place the purple (or bottom) whole layer on your serving plate, spread a thin frosting layer, then stack a cut-out layer on top; repeat until all cut-out layers are stacked with frosting between each. This frosting acts as glue, so don't be stingy, but don't make it so thick that layers slide around.
- Fill the cavity with candy:
- Pour your assorted candies into the hole in the center—this is the fun part and honestly, you can't mess it up. Use your fingers or a spoon, just pile it in generously so when someone cuts a slice they get a real surprise.
- Crown your cake:
- Place the final whole layer (the top layer) over the candy-filled cavity and gently press down so it sits evenly; now your cake looks normal on the outside but hides a delicious secret inside.
- Frost the entire outside generously:
- Use an offset spatula and frosting to coat the sides and top; don't worry about making it perfect because the decorations cover any mistakes anyway. If you want colored frosting swirls, divide some frosting into bowls and tint it with gel coloring before applying.
- Decorate as festively as you feel:
- Add sprinkles, pipe frosting flowers, dust with colored sugar, or just leave it smooth and elegant—it's your cake and your rules. I usually go wild with rainbow sprinkles and maybe some edible flowers because it's a celebration.
- Chill before the big reveal:
- Pop the cake in the fridge for 30 minutes so the frosting sets and the cake becomes easier to slice cleanly; this also helps the layers stay in place when you cut into them. Cold cake slices like butter instead of crumbling like sand.
 Save
Save The best moment isn't when someone takes the first bite—it's the pause right before they cut into it, when they don't know what's coming. That moment of anticipation, that tiny gasp when candy falls out, that's what makes this cake more than just dessert.
Why Rainbow Layers Matter
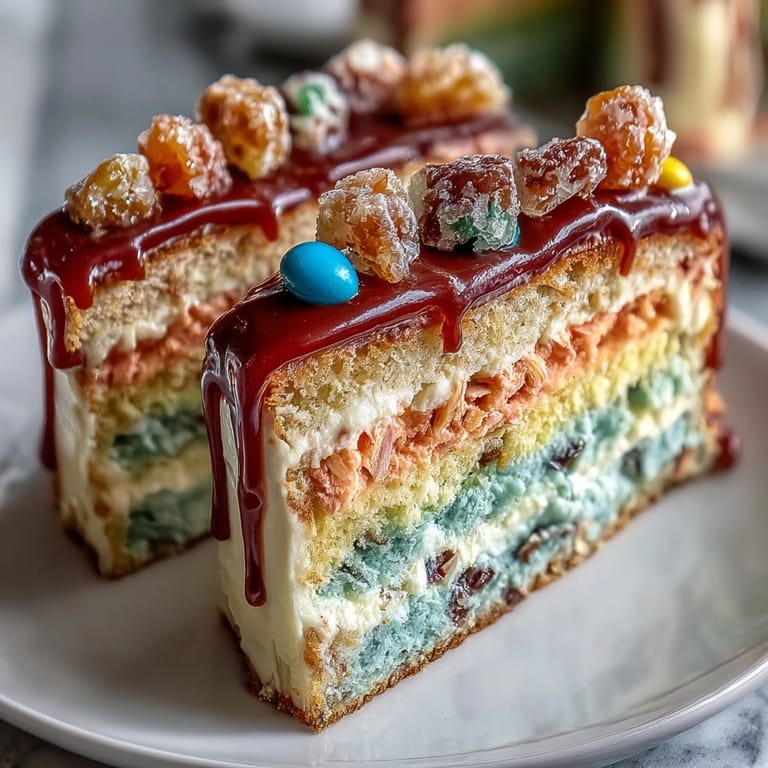
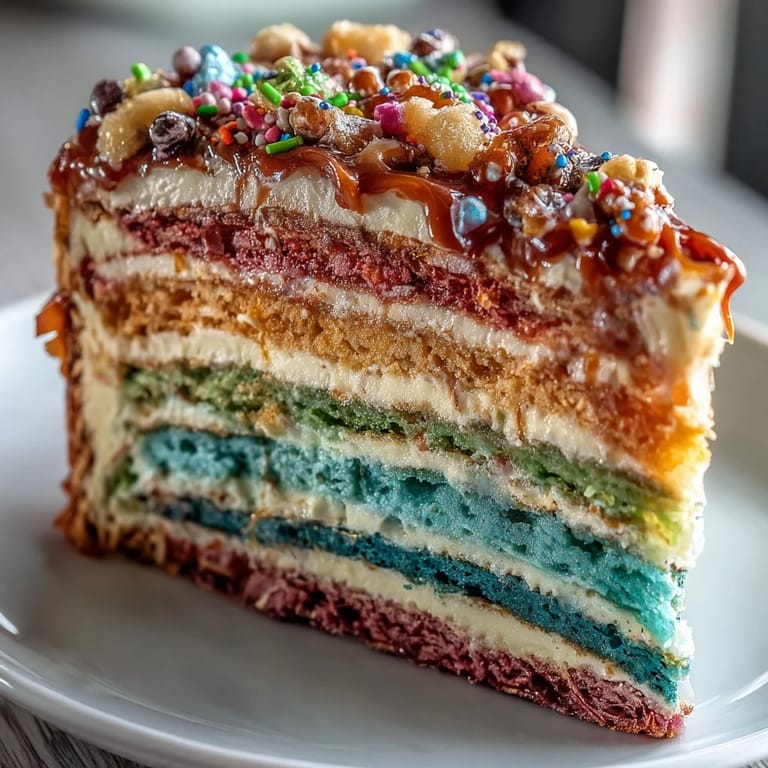
Honestly, the six colors could technically be fewer, but there's something about having the full spectrum that makes it feel like a real celebration instead of just a cake. Each layer is its own little moment—red reminds you of passion, orange feels warm, yellow is joyful, green is fresh, blue is calm, and purple feels a little bit fancy. When you stack them together, they tell a story without saying a word.
The Candy Surprise Strategy
I've tried this with everything from gummy bears to mini chocolate chips, and the best combinations are ones that mix textures—some chewy, some crunchy, some melty. Avoid anything sticky like taffy or hard enough to break teeth like whole almonds; you want people to bite into the cake and have a delightful moment, not a dental emergency. The candies tumble out naturally when you slice through that center cavity, and the surprise is worth every bit of the extra effort.
Frosting Finesse and Final Touches
Buttercream frosting is forgiving, which is why I love it for cakes like this—if it gets too soft, pop it in the fridge for five minutes and it firms right up. If you're decorating it in layers like I do, make some frosting plain white and tint the rest with gel colors to create those pretty streaks or patterns that look Instagram-worthy but take maybe an extra minute. Here are my final tips for making this cake shine:
- Let the cake come to room temperature for about 15 minutes before serving so the cake is moist but the frosting isn't melting.
- Use a long serrated knife and wipe it clean between slices so each piece shows off those pretty layers.
- Serve with cold milk or that fruity margarita the notes mentioned—either way, celebrate that you made something this beautiful and delicious from scratch.
 Save
Save This cake is pure joy in every slice, and honestly, that's reason enough to make it. Whether it's Cinco de Mayo or just a Tuesday when you want to remind people that dessert can be an adventure, this piñata cake delivers.
Kitchen Questions
- → How do I create the colorful layers?
Divide the batter into six portions and tint each with a different gel food coloring—red, orange, yellow, green, blue, and purple—before baking.
- → What type of candies work best for the filling?
Use small, non-sticky candies like mini M&Ms, sprinkles, or gummy bears to ensure easy slicing and prevent mess.
- → How can I prepare the cake for easier slicing?
Chill the assembled and frosted cake in the refrigerator for at least 30 minutes to firm it up before serving.
- → Can I make this cake gluten-free?
Yes, substitute the all-purpose flour with a 1:1 gluten-free flour blend to accommodate gluten sensitivities.
- → What tools are necessary to assemble the cake?
You'll need round cake pans, a 3-inch round cutter to hollow out layers, an electric mixer, and tools for frosting and decorating.